The RE-KORD is a project that was suggested by a Notes and Volts viewer. They play bass in a band and needed a way to play chords on a Midi sound generator. The RE-KORD is a box that sits between a midi keyboard and a midi sound source. You can program up to 8 notes into each key on the keyboard and trigger them all with one press! Watch the video for details.
I love Teensy Microcontrollers! I'm constantly finding new uses for them. In this video, we will use a Teensy 3.2 with the matching SGTL5000 Audio board to make a stand-alone synth filter! This will also work with the Teensy 4.x series. The Teensy 3.x and 4.x use different Audio boards so make sure you get the correct one.
The FADR-4 is a programmable - four fader - USB Midi Controller. It uses 100mm faders for precise control and a quick one button and LED interface for changing Midi CC numbers. Check out this video to learn how to build one! VIDEO
Download the code and schematics at my Github page HERE
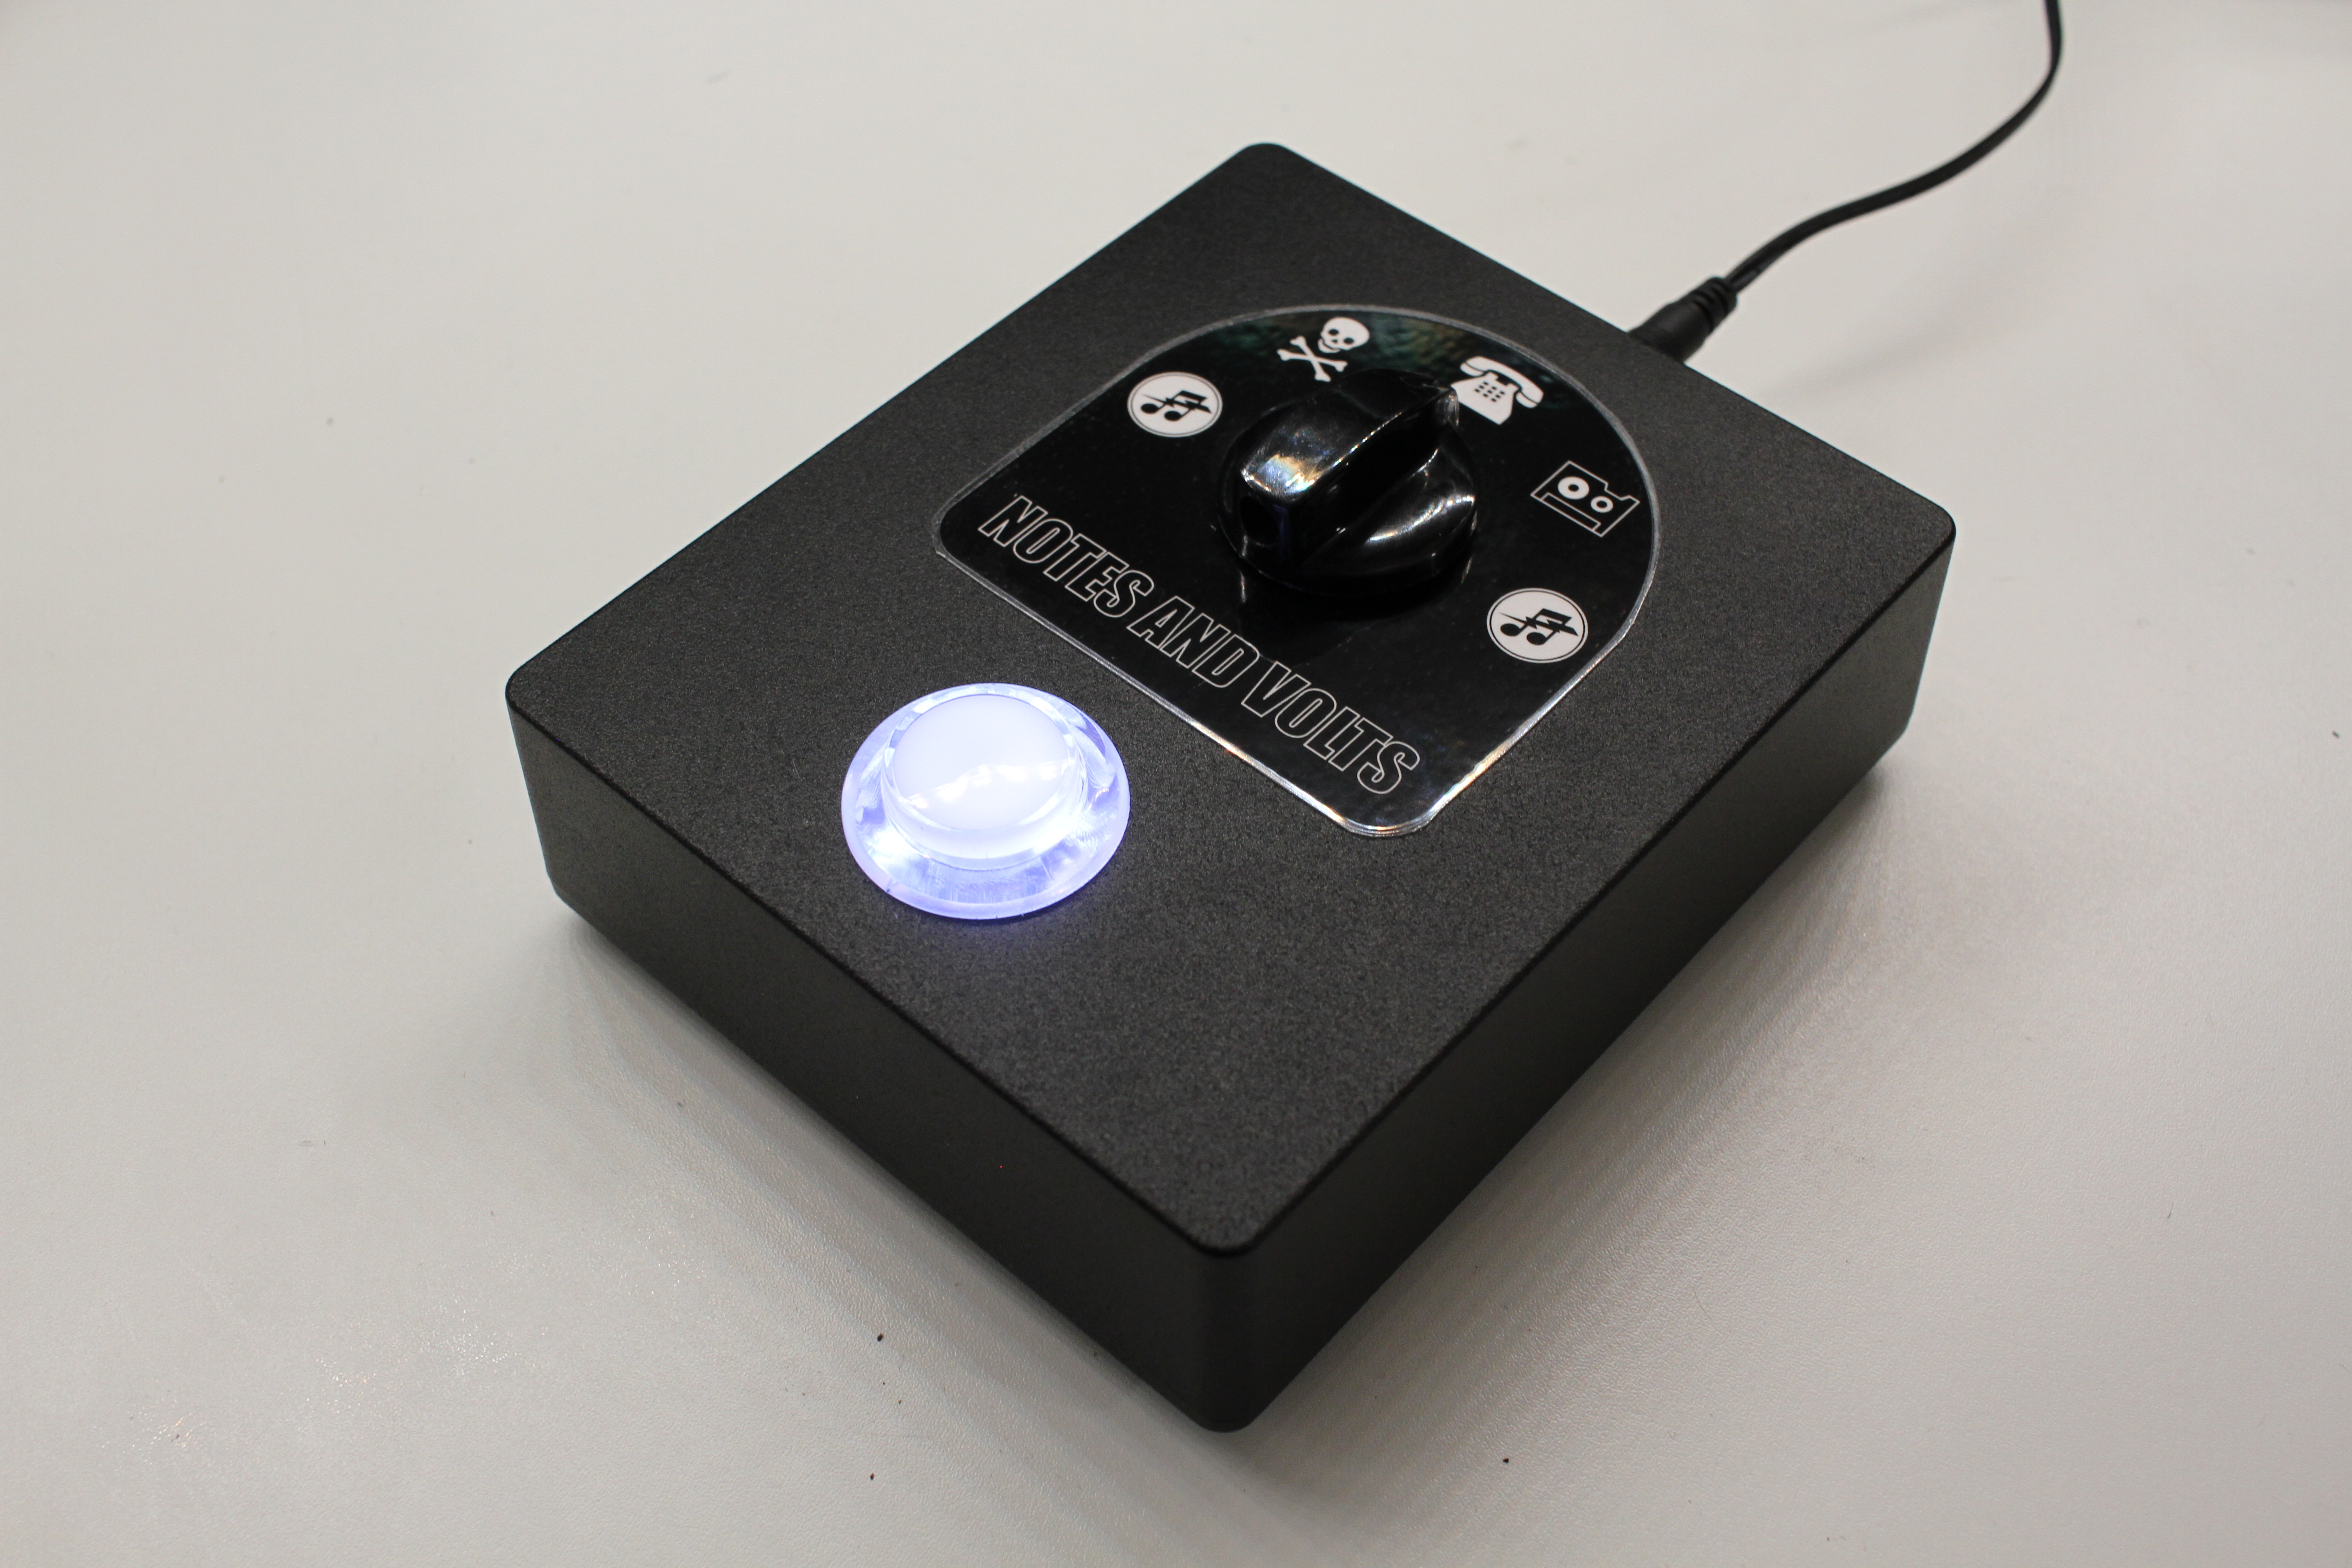
I needed a way to remotely trigger my Roland VT-4 voice transformer easily. So I came up with this remote control box that connects via 5-Pin Midi to the VT-4. It uses a 4-Position rotary switch to select presets and an Arcade Button to trigger them. Here's how you can build one!
Dave Makes Your Dreams Come True is a show where I take a random viewer request and make it reality! In this episode I am building a custom controller for a Strymon BigSky reverb for a viewer named Hank.
The best part of being a maker is being able to build the exact solution to your problem. I have spent the last few years building a musical playground that allows me to create jams on the fly when I livestream on my Twitch Channel. I've been slowly refining this process and learning how to be a one man band. I recently got to perform at Synthfest which put my skills to the test.
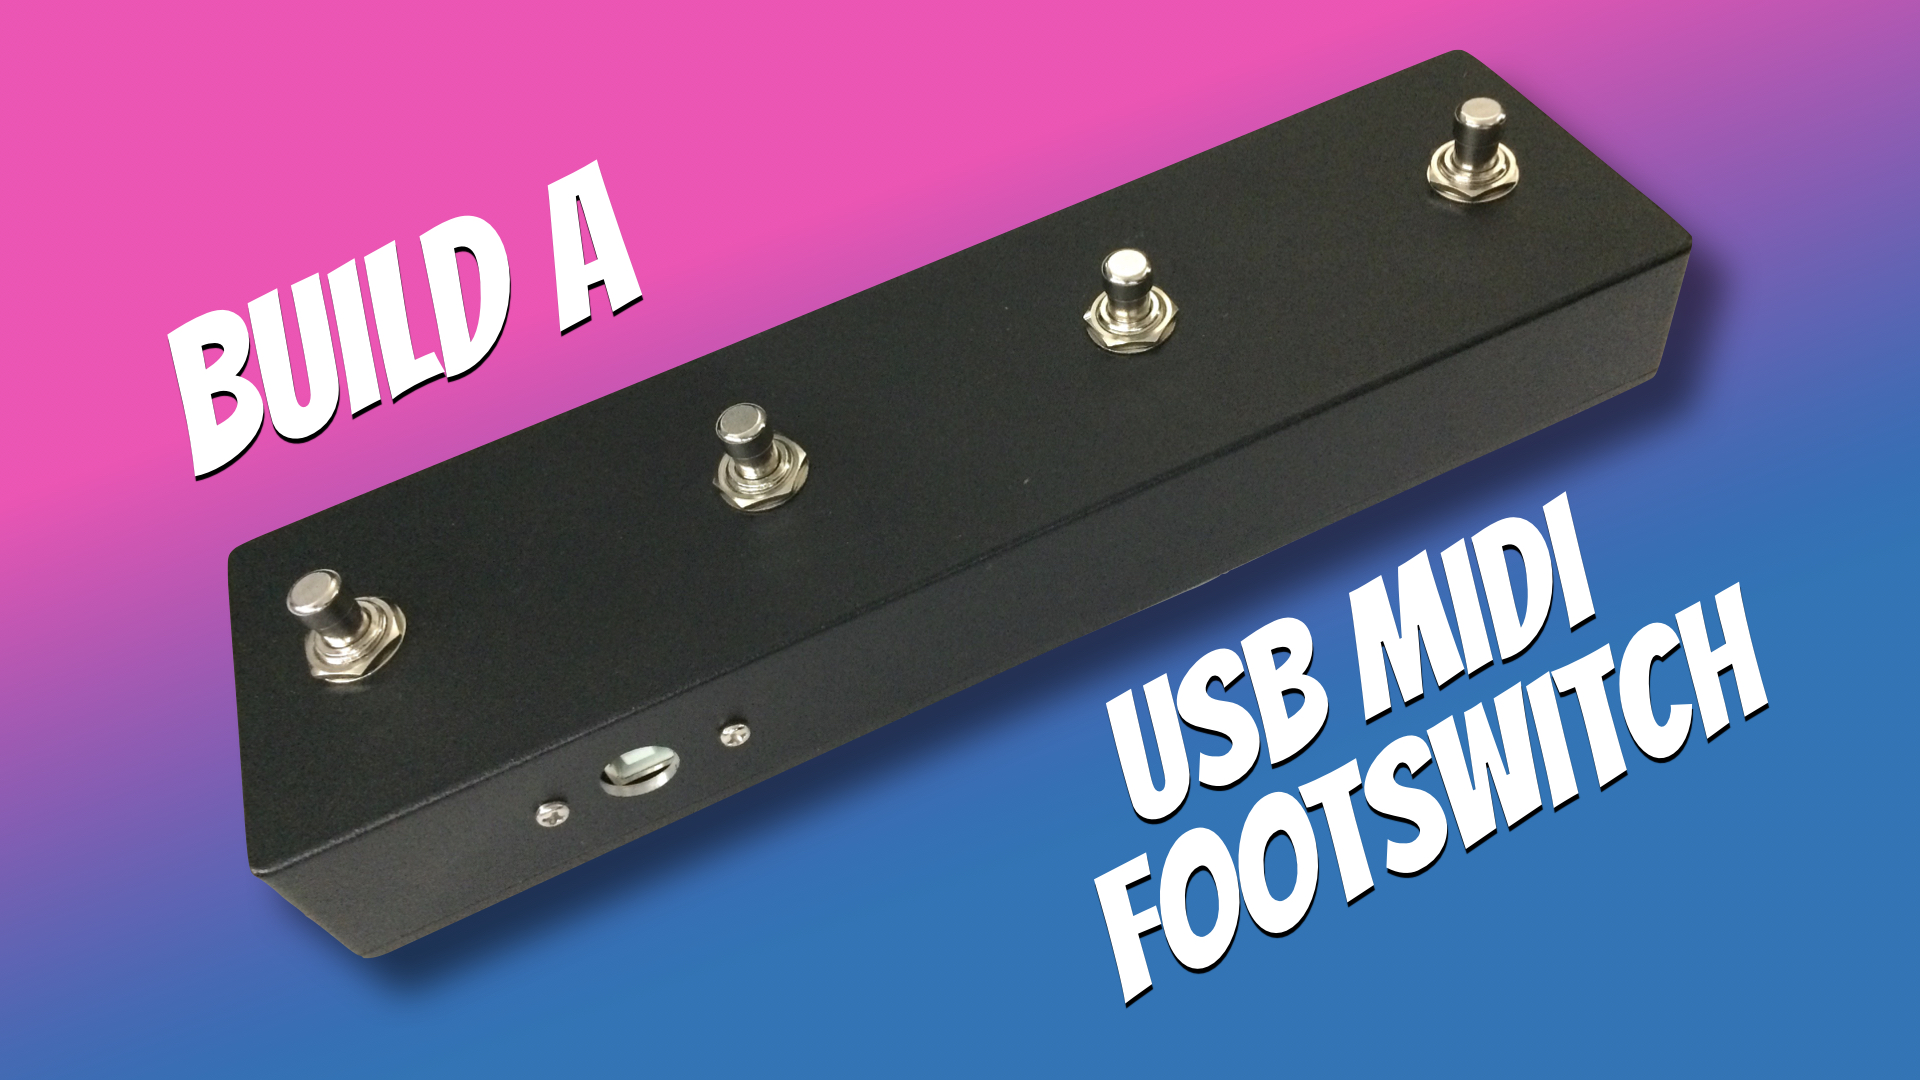
I discovered a great piece of looping software called Endlesss that greatly simplifies capturing my ideas in real time. You just play and hit a button to capture a loop. This works great - until I pick up my guitar. Then my lack of free hands makes looping an awkward proposition. The solution - a footswitch!
I designed a simple four button footswitch that puts out a Midi CC command when the switch is pressed. This is mapped into Endlesss to record the loops. Simple! I call it the EDLS-FS (pronounced as "Endless FS"). It's a very simple project that makes a great introduction into Midi controller design.