Showing posts with label MIDI. Show all posts

Friday, 29 September 2023

Play a Chord with one foot - Arduino - RE-KORD

Download the Code and Schematic HERE

The RE-KORD is a project that was suggested by a Notes and Volts viewer. They play bass in a band and needed a way to play chords on a Midi sound generator. The RE-KORD is a box that sits between a midi keyboard and a midi sound source. You can program up to 8 notes into each key on the keyboard and trigger them all with one press! Watch the video for details.

Saturday, 1 July 2023

Build a Midi to Relay Box for Arduino

Download the code HERE

PARTS LIST (with Amazon links)

1 - Relay Board (8 relays)

1 - Arduino Nano

1 - 6N138 Optocoupler

1 - 1N914 Diode

1 - LED

2 - 220 Ohm Resistors (1/4 Watt)

1 - 470 Ohm Resistor (1/4 Watt)

1 - 4.7K Ohm Resistor (1/4 Watt)

1 - Midi Jack

1 - 5V Power Adaptor (1-Amp)


Friday, 2 December 2022

Build a Programmable USB Midi Controller - FADR-4


The FADR-4 is a programmable - four fader - USB Midi Controller. It uses 100mm faders for precise control and a quick one button and LED interface for changing Midi CC numbers. Check out this video to learn how to build one! VIDEO

Download the code and schematics at my Github page HERE


PARTS LIST (with Amazon Associate Links)

1 - Teensy LC Microcontroller

1 - 74AHCT125 Quad Buffer

1 - MAX7219 LED Driver

1 - Three Digit LED Display - Common Cathode

2 - 0.1 MicroFarad Capacitors

1 - 33K Ohm Resistor - 1/4 Watt

1 - Panel Mount USB Adaptor cable (Micro to USB B)

1 - Push Button - Momentary - Normally Open

4 - 10k Ohm (Linear Taper) Potentiometers - Can be Faders or Turn Pots

(I used ALPS RSA0N1119A02)

Tuesday, 1 November 2022

ROLAND VT-4 Midi Remote Control

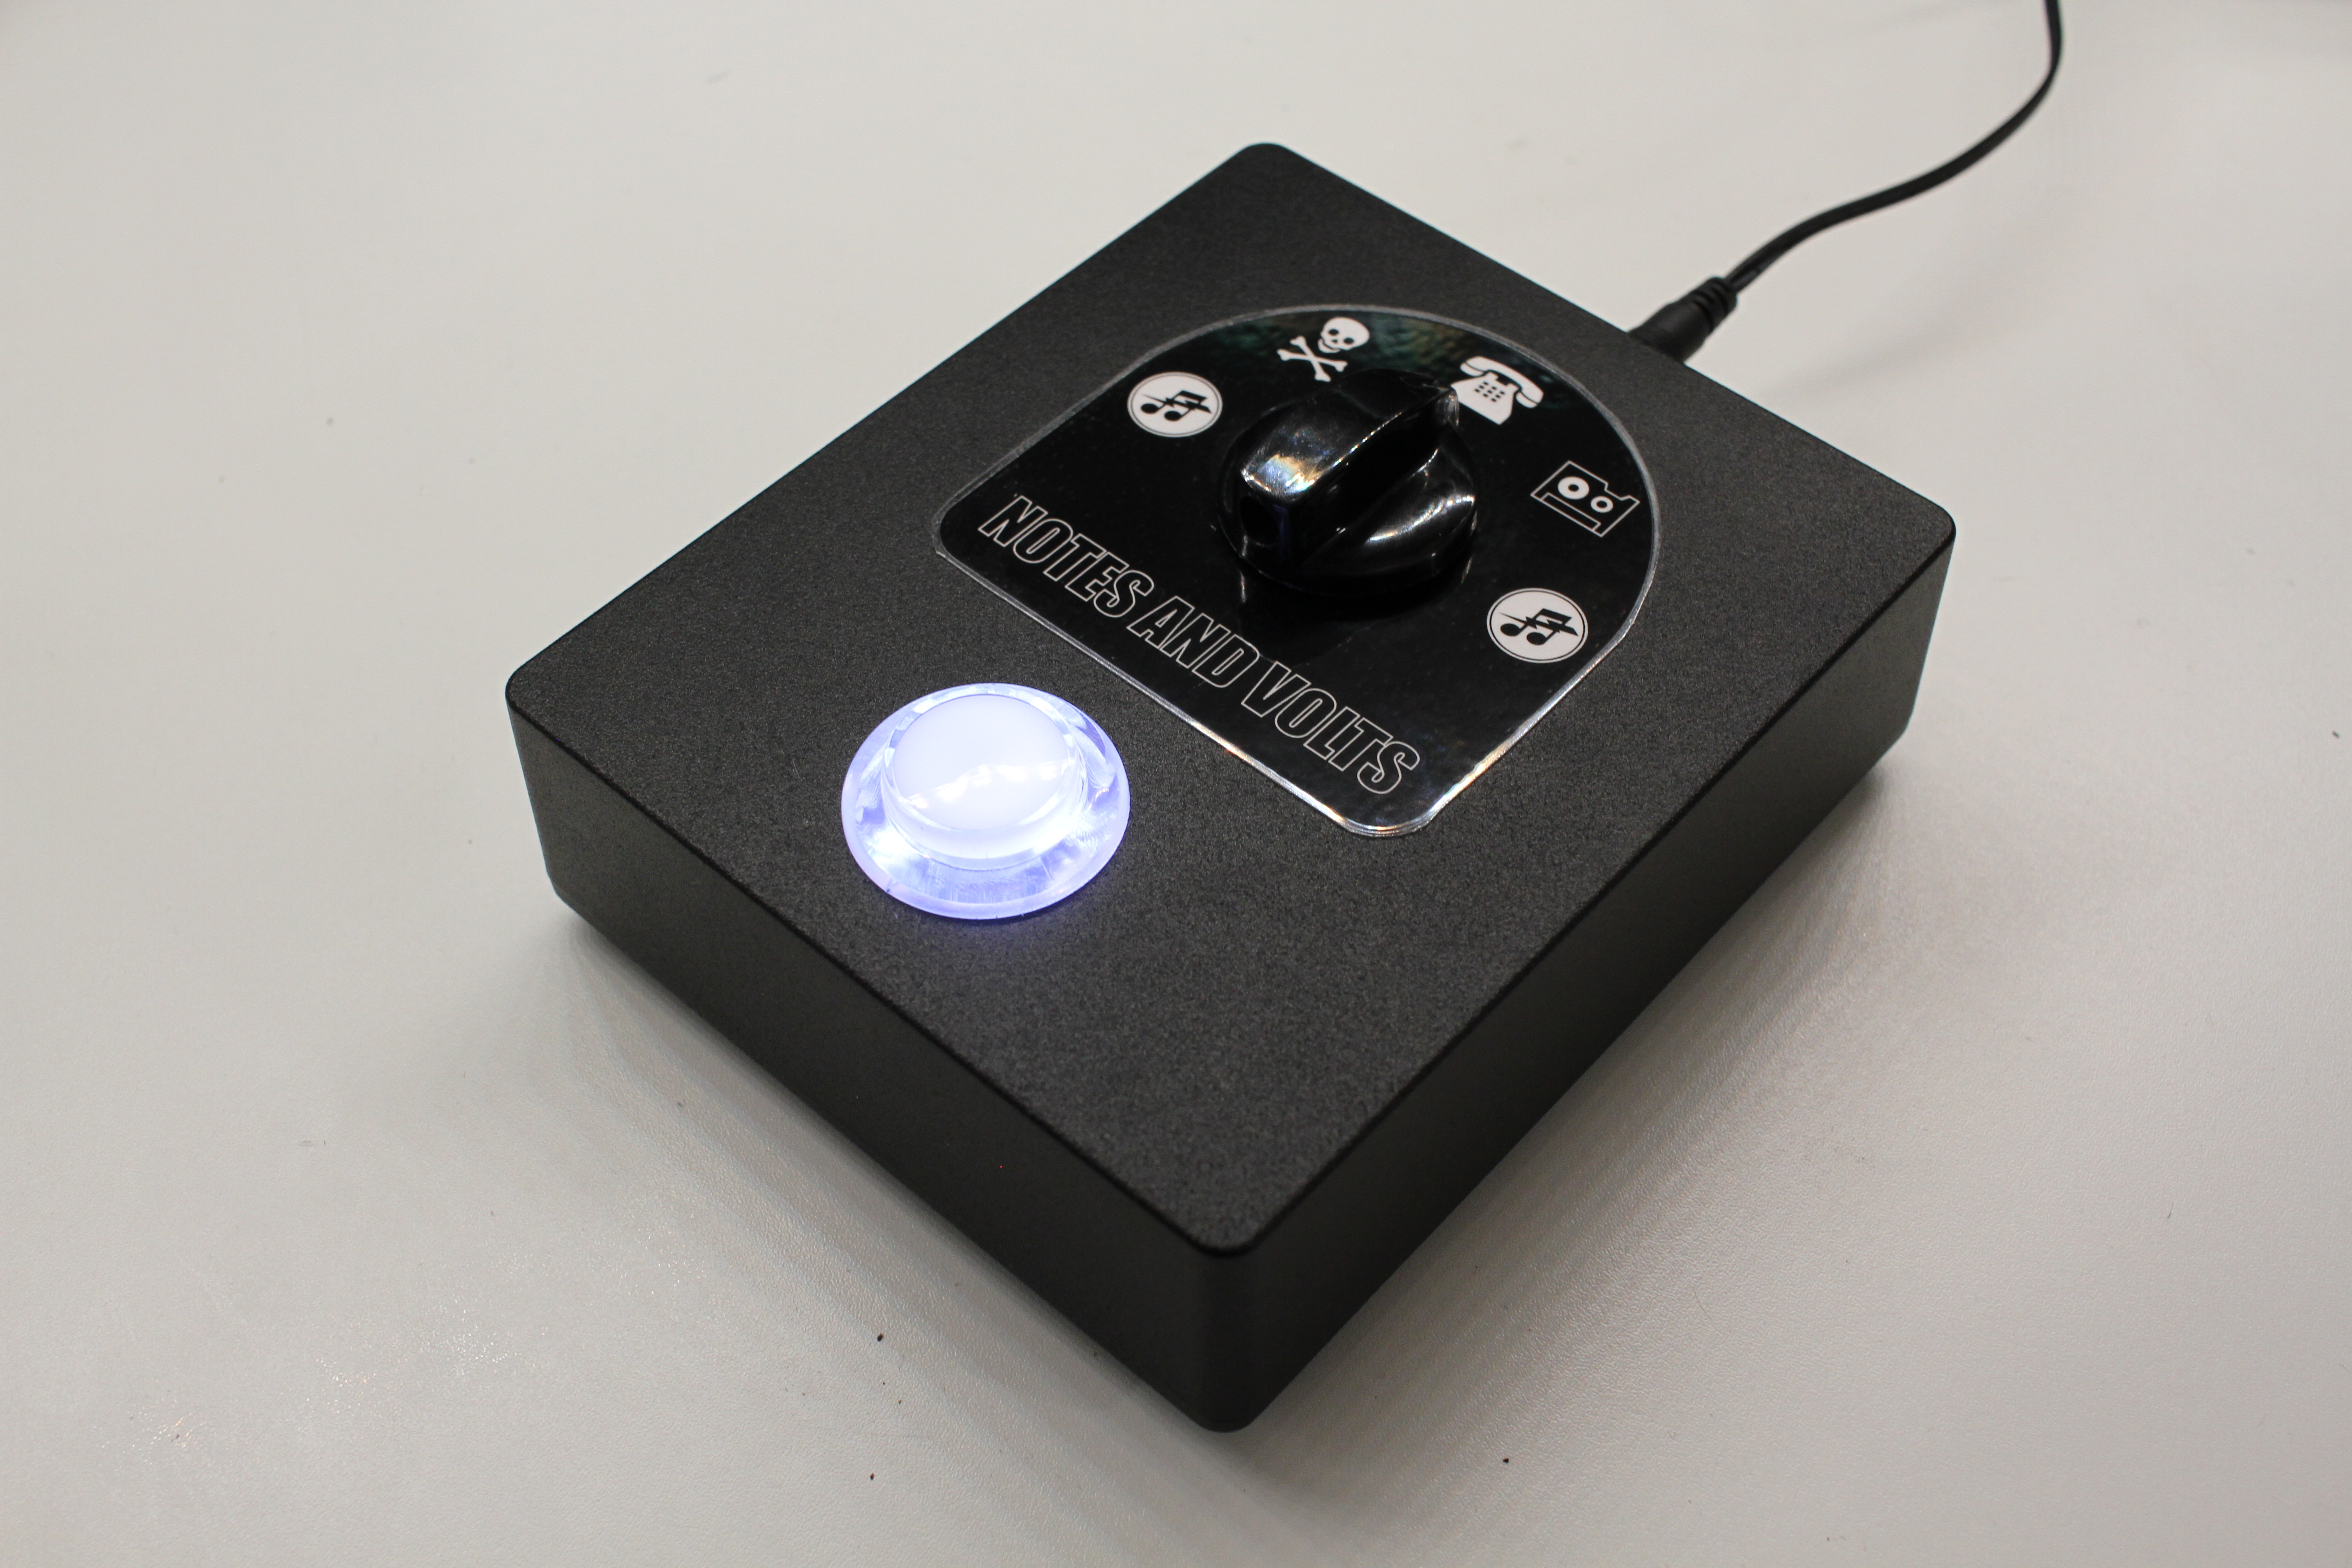
I needed a way to remotely trigger my Roland VT-4 voice transformer easily. So I came up with this remote control box that connects via 5-Pin Midi to the VT-4. It uses a 4-Position rotary switch to select presets and an Arcade Button to trigger them. Here's how you can build one!

Download the code and schematic HERE


Parts List (with Amazon Links)

1 - Arduino Nano

1 - 4 Position Rotary Switch OFF/ON/ON/ON

1 - Arcade Button with LED

1 - Panel Mount MIDI Jack

2 - 1/4" Mono Phone Jacks

3 - 220 Ohm Resistors 1/4 Watt

1 - Power Jack 2.1mm

1 - Adafruit Perma-Proto Board (Half-Size)

1 - Hammond 1590XXBK Enclosure

Wednesday, 17 August 2022

Dave Makes Your Dreams Come True - Strymon BigSky Remote

Dave Makes Your Dreams Come True is a show where I take a random viewer request and make it reality! In this episode I am building a custom controller for a Strymon BigSky reverb for a viewer named Hank.

Download the code and schematic HERE

Parts List (with Amazon Links)

1 - Arduino Nano 5V

2 - SPST Footswitches

1 - Midi Jack

4 - 220 Ohm Resistors

2 - LEDs

1 - Power Jack


Sunday, 1 May 2022

Build a USB Midi Footswitch

Download the files for this project HERE

The best part of being a maker is being able to build the exact solution to your problem. I have spent the last few years building a musical playground that allows me to create jams on the fly when I livestream on my Twitch Channel. I've been slowly refining this process and learning how to be a one man band. I recently got to perform at Synthfest which put my skills to the test.

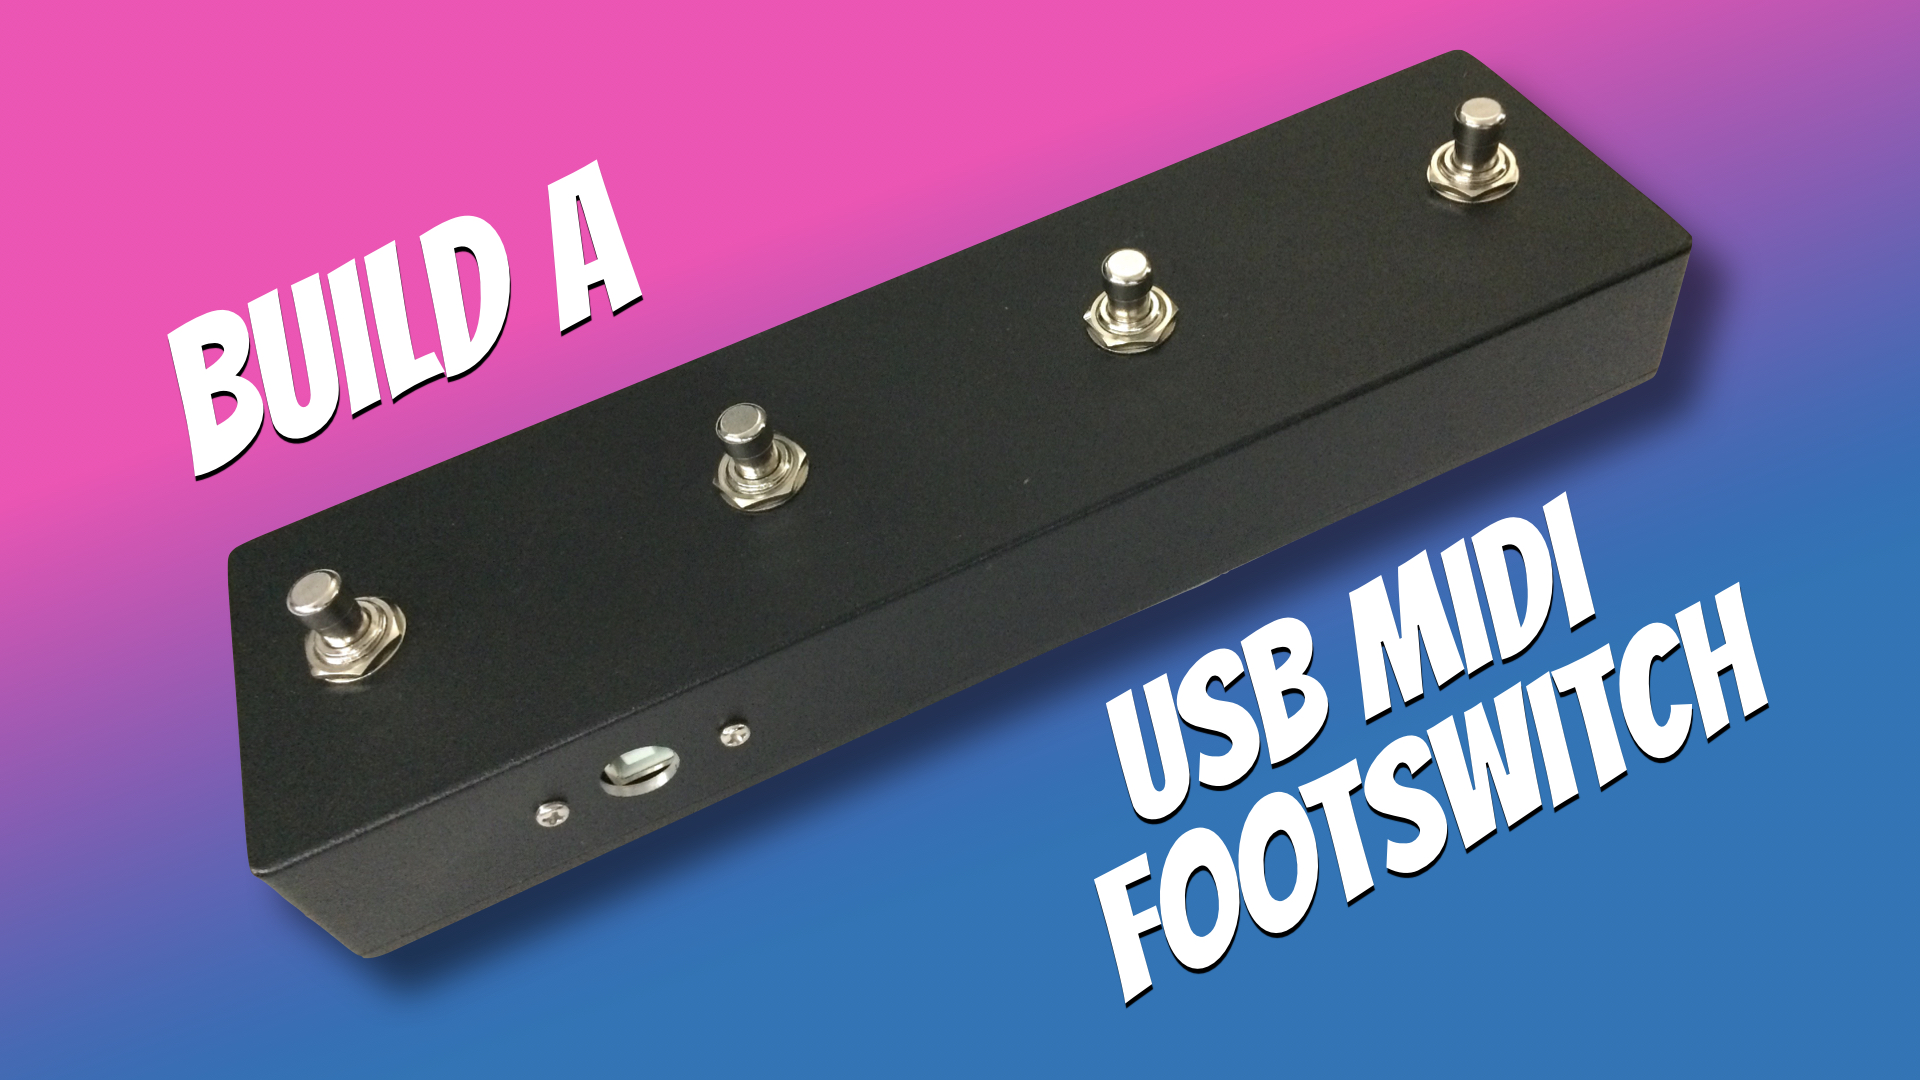
I discovered a great piece of looping software called Endlesss that greatly simplifies capturing my ideas in real time. You just play and hit a button to capture a loop. This works great - until I pick up my guitar. Then my lack of free hands makes looping an awkward proposition. The solution - a footswitch!

I designed a simple four button footswitch that puts out a Midi CC command when the switch is pressed. This is mapped into Endlesss to record the loops. Simple! I call it the EDLS-FS (pronounced as "Endless FS"). It's a very simple project that makes a great introduction into Midi controller design.

Watch this video for build instructions:


Parts List (with Amazon Affiliate Links)

1 - Hammond 1590BX2-BK Enclosure

1 - Teensy LC Microcontroller

4 - SPST Momentary - Normally OPEN Footswitches

1 - USB B to Micro USB Panel Mount Cable

2 - Rolls of 22AWG - Stranded Wire


Tools Used

- Soldering Iron

- Drill with 1/2" Stepped Drill Bit

- Automatic Center Punch


Thursday, 6 May 2021

Project C.H.E.E.T.A.H.


The goal with project CHEETAH is to build a box that makes you sound like a Synth Wizard without really knowing what you are doing. All you need to do is press a pedal (Major, Minor, Dominant) and ideas of that type will flow from your fingers.

Watch these videos for a full demonstration!


When you're ready to build one you can find the code and schematics at my GitHub Page 


Parts List (with Amazon affiliate links)


1 - Arduino Nano (clone version)
1 - 6N138 Optocoupler
1 - 1n914 Diode
2 -  5 Pin Midi Jack
3 - 220 Ohm Resistor
1 - 1K Ohm Resistor
1 - 470 Ohm Resistor
3 - Footswitch - SPST Momentary
1 - Adafruit Perma-Proto 1/2 Sized Breadboard
1 - Chip Socket - 8 Pin
1 - Header - 2 Pin - (or cut from longer Breakaway type)
1 - Jumper - 2 Pin
1 - Hammond 1590DD Aluminum Enclosure - Black preferred
1 - DC Barrel Jack - 2.1mm
4 - Rivets - 1/8" Aluminum - 1/4" Grip
2 - M3 PCB Standoffs - 10mm
4 - M3 x 6 - Button Head Bolts
4 - Rubber Feet - Adhesive


Tuesday, 2 February 2021

TEENSY-Synth EXTRA 2: GOLDEN Synth

In the last installment we decided to use the built-in 12 Bit DAC that comes with the Teensy 3.2 board. For the prototype I decided to try something different and came up with a Gold Edition of the TS-1.

You can download the code for this new version HERE


TEENSY-Synth EXTRA: Do we need the Audio Board?

 Here's an update for the Teensy-Synth project. The original project used the Teensy Audio Adaptor Board for it's audio output. This provided 16-Bit audio at 44.1 Khz.

The Teensy 3.2 also has a built-in DAC providing 12-Bit audio at 44.1 Khz so I wondered if this was suitable for out synth project. Watch the video for the results.


Tuesday, 3 March 2020

DIY TRAKTOR Loop Controller - PART 2

Welcome to Part 2 of the LOOP-R controller for TRAKTOR S4 MkIII. In Part 1 I showed you the circuit and how to build it. In this part we'll take a look at how I came up with a custom enclosure to make it look pretty.


Friday, 29 November 2019

DIY TRAKTOR Loop Controller - PART 1

I recently got a TRAKTOR S4 MkIII so I could do some live music production on my Twitch streams. The Traktor software has a Loop Recorder included but unfortunately, Native Instruments removed the loop controls on the MkIII. No big deal, we'll build our own!

I call this project the LOOP-R and it allows you to easily access all the loop recorder commands with the push of a button. Watch the video to learn how to build your own on a breadboard.


Download the code and schematic HERE

Parts List: (With Amazon Links)


1 - Teensy LC (With pins)
5 - Push Buttons (Momentary - Normally Open - 12x12)
1 - LED (Red)
1 - 330 Ohm Resistor
1 - 10K Potentiometer (Linear - Center Detent)
2 - BreadBoards
1 - Phone Jack (Mono - 1/4")
1 - Foot Switch (Normally Open)
Jumper Wires (Assorted)

Thursday, 28 February 2019

TEENSY-Synth PART 11 - ENCLOSURE

After a lot of long nights in the lab I have finally finished the enclosure for the TEENSY-Synth! This was a challenging build and I had to pick up a few new tricks along the way, but I'm really happy with the way it turned out.


Download the files for this project HERE


Here are the exact parts for this project and where I purchased them.

Parts List:


Mouser Electronics

1 - Enclosure: Hammond 1590DDBK
15 - Potentiometers: 652-PTV09A-4025FB103
15 - Knobs: 450-4760
1 - USB Connector: 523-UE27-BC54-130
1 - 6N138 Optocoupler: 782-6N138
1 - Midi Jack:161-0005-E
1 - 1n4148 Diode: 512-1N4148
1 - 74HC4067 Multiplexer: 595-CD74HC4067M96
1 - LM7805 Regulator: 926-LM7805CT/NOPB
1 - 1N4001 Diode: 863-1N4001G
1 - 100uF Electrolytic Capacitor: 140-RGA101M1EBK0611G
1 - 10uF Electrolytic Capacitor: 80-ESK106M035AC3AA
1 - 220 Ohm Resistor (1/4 Watt): 603-CFR-25JR-52220R
1 - 470 Ohm Resistor (1/4 Watt): 603-CFR-25JR-52470R
2 - 0.1uF Capacitor: 594-K104M15X7RF53L2

Amazon

3 - Toggle Switch: SPST
1 - Barrel Jack: 2.1mm
1 - 1/4" Jack: Mono TS
4 - M3 Standoff: 10mm
8 - M3 Screw: Button Head 5mm


Wednesday, 30 January 2019

TEENSY-Synth PART 10 - HARDWARE

In this episode we are going to add Potentiometers and Switches to the TEENSY-Synth with the help of a 74HC4067 Multiplexer.

Download the example code and schematic HERE

Parts List: (Amazon Affiliate Links)

1 - 74HC4067 Multiplexer (Do NOT get the 74HCT4067 version)
(NOTE: The DIP package of the 74HC4067 seems to be going away. If you want to experiment with this circuit on a breadboard you can use a breakout board like this one from SparkFun)

3 -  SPST toggle switches
15 - Potentiometers - 10K - Linear Taper
1 - 5 Pin Midi Jack
1 - 6N138 Optocoupler
1 - 1n4148 Diode
1 - 220 Ohm Resistor (1/4 Watt)
1 - 470 Ohm Resistor (1/4 Watt)
Breadboard
Hook-up wire

Power supply circuit (optional)
1 - Barrel Jack - 2.1mm
1 - LM7805 Regulator
1 - 1N4001 Diode
1 - 100uF Electrolytic Capacitor
1 - 10uF Electrolytic Capacitor

Friday, 30 November 2018

TEENSY-Synth PART 9 - MIDI INPUT

So, I know I said that the TEENSY-Synth project was over. But, I have been receiving so many requests, suggestions, and videos from people who have been inspired by this project - I think it deserves a little more attention.

Many people have been asking for a fully self-contained, hardware version of the synth so that is what we will do! The first step is to add a 5-Pin Midi jack to the synth so it can be easily connected to older synths and sequencers.

Download the example code HERE


Parts List: (Amazon Affiliate Links)

1 - 5 Pin Midi Jack
1 - 6N138 Optocoupler
1 - 1n4148 Diode
1 - 220 Ohm Resistor (1/4 Watt)
1 - 470 Ohm Resistor (1/4 Watt)
Breadboard
Hook-up wire

Tuesday, 11 September 2018

TEENSY-Synth PART 8 - LFO

In this episode we will add an LFO to our TEENSY-Synth. This low frequency oscillator can be set to control the pitch of the note or the filter frequency.

Download the example code HERE


Monday, 13 August 2018

TEENSY-Synth PART 7 - PITCH BEND

In this episode we will add Pitch Bend to the synth. To properly understand  pitch bend messages we will look at the bits and bytes of the Midi language. If you are unfamiliar with Binary numbers you can get a quick primer by watching: MIDI for the Arduino - Understanding MIDI Language

Download the example code HERE


Saturday, 4 August 2018

TEENSY-Synth PART 6 - FILTER

In this episode we will add a Filter to the synth and learn how to control it with a Akai MPK Mini MKII controller.

Download the example code HERE


Thursday, 26 July 2018

TEENSY-Synth PART 5 - WAVEFORM SELECT & DETUNE

In this episode we will add a Waveform selector and Detune control. This is starting to sound good!

Download the example code HERE


Thursday, 12 July 2018

TEENSY-Synth PART 4 - ADSR

In this episode we will add an ADSR envelope generator to our synth. We'll also clean up our control panel using Pure Data Sub-patches.

Download the example code HERE


Thursday, 21 June 2018

TEENSY-Synth PART 3 - KEYBOARD

In this episode we are going to make our synth playable by connecting a USB-Midi keyboard. We'll also look at Key-Buffers, Last Note priority, and code optimization.

Download the example code HERE